Are you searching for how to start a blog but don't know where to start?
It is not a rocket science as many people try to make it so! If you follow this step-by-step guide, you’ll have your blog up and running after 1 hour max! Are you ready?
I'll cover everything from choosing a domain name to picking a niche and setting up your website.
My only advice to you is “take action” on every step I mention, ok? Let’s start and have some fun!
Table of Contents
Step 1: Choose Your Blog Niche and Name
Before we start, I want to discuss something with you.
I want you to define your “WHY”. Why do you want to start a blog / website?
………………
Ok, let me share with you my “WHY”, I want to help people start their online businesses and help them make money, and of course I will make money along the way.
That’s it!
Blog Niche Examples - You could write about:
1) Your Life Experiences
If you have any experience or knowledge that could be helpful to others, whether it's related to your work or not, consider blogging about it. People often start blogs based on their personal experiences, so if you have something valuable to share with the world, a blog may be the perfect medium for doing so.
2) A Personal Blog
You can also write a blog about your daily life. This can include things you do in your daily life, your work, what you do on the weekend Etc. For example, as a stay-at-home mom, you can write about your daily experience as a mother. If you work from home, you can also write about your experiences working from home. And the list goes on.
3) Your Hobbies
Anything that interests you can be a topic for your blog.
Blogging is a great way to share your passions with the world. The subjects that interest you are likely something others also find interesting, or at least something they don't know much about. You could write about topics such as model airplanes, cooking, sports, fashion and make up etc., anything that captures your imagination!
4) Personal Branding
To be successful with a blog, you need to establish yourself as an authority in your field. This can be done by creating a personal brand that people can relate to. People are more likely to take advice from someone they know and trust than from a stranger. So, it’s important that you build up your reputation as an expert in your field. Then, when people come across your work, they will know that you are credible and worth listening to.
Establishing a rapport with your audience is essential for effective affiliate marketing. If you can build trust and credibility with your customers, they are more likely to buy products you recommend from you.
Choosing Your Blog Domain Name
To create a successful blog, choose a name that accurately reflects the content of your blog. For example, if you blog about cooking, then your domain name should reflect this by including words such as "cooking," "food," or "meal."
If you want to make your blog more personal, then using your name as the domain name is a good idea, such as using your first and last name.
After brainstorming some possible name ideas, you'll want to choose a domain extension. .com is the most popular choice, but .net or .org work just as well. It's important to note that for blog domains, you cannot have any spaces between words. For example, my website is “passiveacademy.com” not “passive academy”.
Step 2: Set Up Your Blog
First, what do we need to start a blog?
The short answer: Domain Name, Hosting, and WordPress
Let’s make it easier. A hosting is like you rent a piece of land, a domain is the address for your piece of land, and the WordPress is the house you’ll build on the piece of land. Ok!
So, you understand the concept. Where to get this stuff?!
Here are the steps you will need to take:
1. Click here to get a discount on Bluehost. I use Bluehost myself for blog hosting and my readers get a special deal. It's only $2,95 a month. That's $35.40 for the entire year.
2. Choose "Hosting" at the top, then click "Shared Hosting". Click "Get Started"
3. Choose the Basic, Plus or Choice Plus (Basic is just fine if you will run 1 website, choose plus if you plan to create more than 1 website)
4. Bluehost gives you a FREE domain for 1 year, write down the domain you want and click Next.
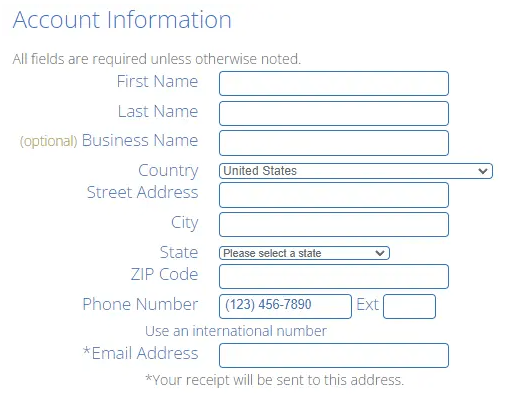
5. Enter your account information
6. Choose the account plan (Basic is all you need)

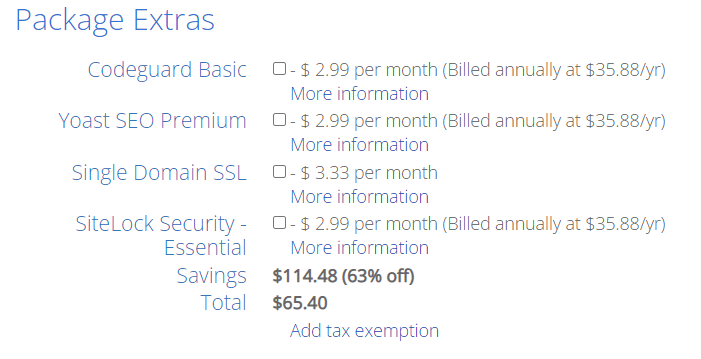
7. Uncheck package extras. You don't need any of these.
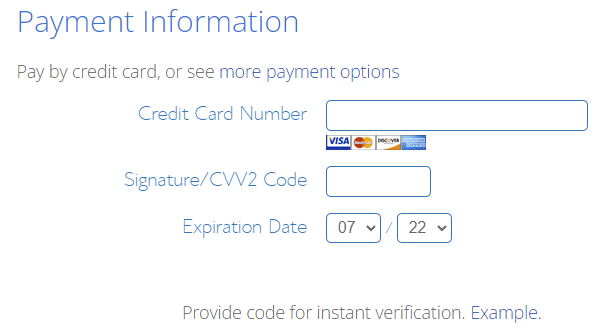
8. Complete your purchase. You can pay with either credit card or PayPal.
9. Answer or skip the onboarding questions. Choose “BLOG” at the prompt.
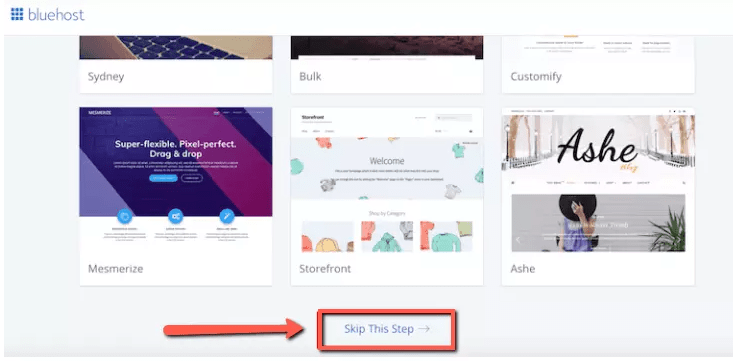
10. When asked to choose your theme, click “SKIP” (I will explain why later)
11. Click the WordPress button from the Bluehost dashboard – you will then be taken to WordPress
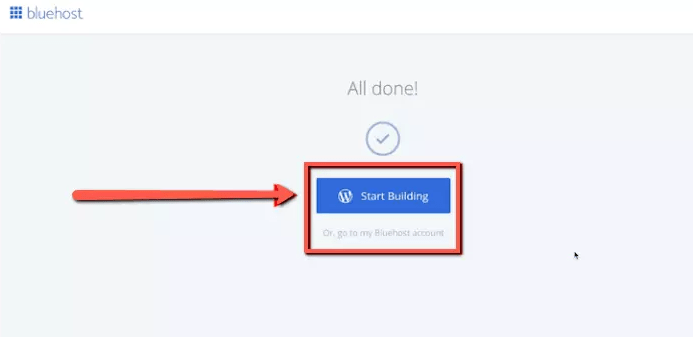
- You now have a self hosted WordPress blog from Bluehost! WELL DONE!
Step 3: Install WordPress
When you're in the WordPress dashboard, you can select a theme. Bluehost will install a default theme for you, but if you want to customize it or find free or premium themes that are better suited for blogging, click the "Skip this Step" button and I'll give some suggestions.
Remember, you can always change your theme. So even if you choose one here, that's perfectly fine.
Next, you are going to click where it says "Start Building".

The next step is to choose what kind of WordPress blog you want to create. You can choose between business or personal.
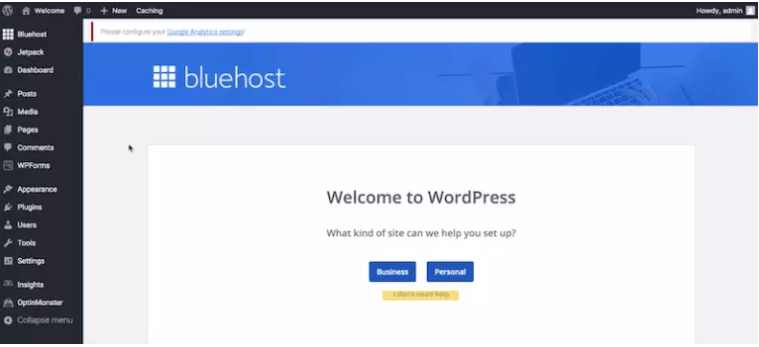
WordPress can help you decide by choosing either one, but I suggest just clicking "I don't need your help" which will take you to your dashboard.
The last step is to enter "Site Title" and "Site Description". For your site title, keep it under 70 characters. For the description, keep it under 160 characters.
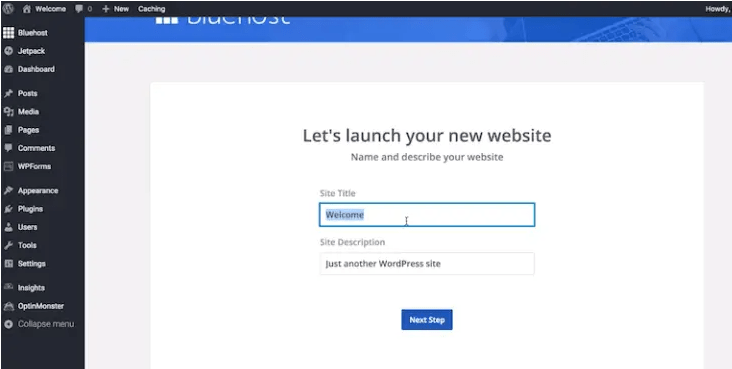
The next step in setting up your blog is choosing a theme. You can ignore this step if you already have a theme in mind or installed it in the previous step. If you want to change it, just go to "Appearance" then "Themes" and change it from there.
Step 4: Choose a WordPress Theme for Your Blog
A WordPress theme is a group of files that include style sheets, graphics and code. These will dictate the overall appearance of your website or blog.
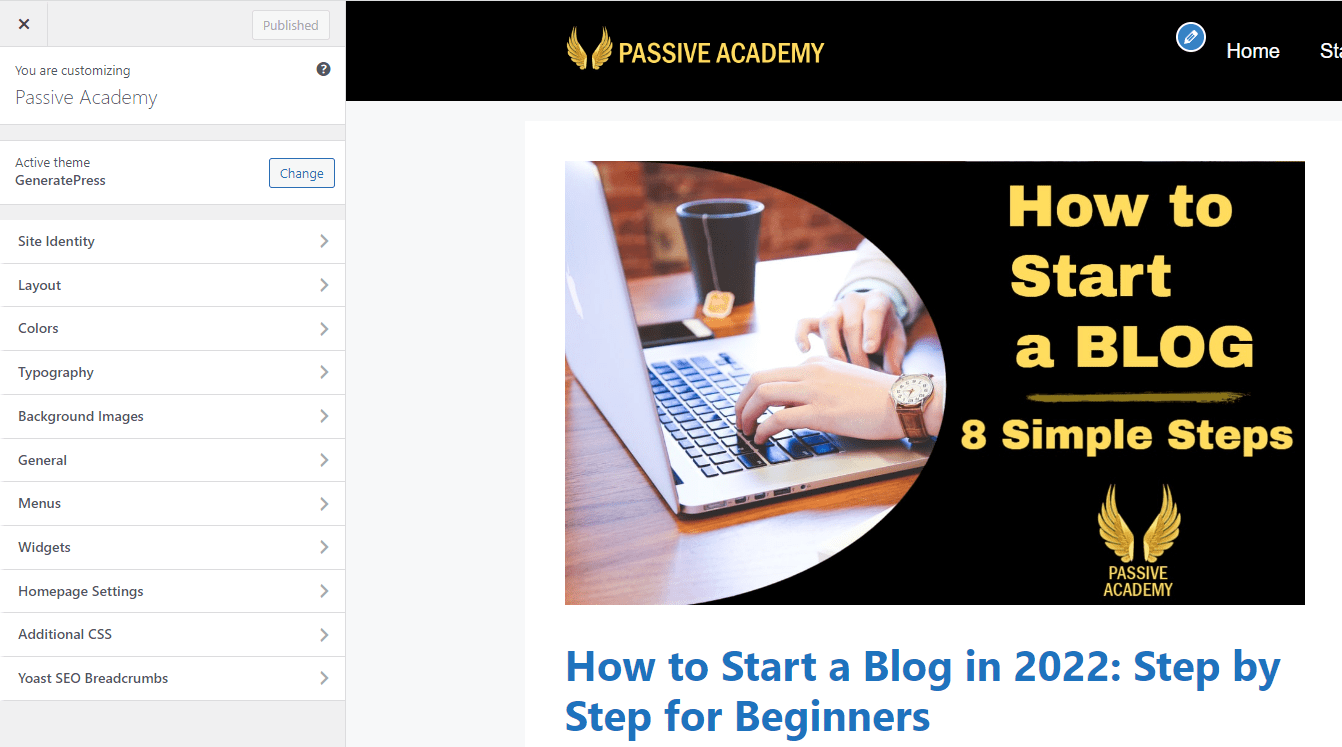
If you have not installed a theme yet, WordPress automatically supplies a default one that might look similar to the one shown in the illustration. You can customize your site by changing the theme when going to your dashboard and clicking on "customize" at the top.
What you're seeing here is a free, default theme.
They are perfectly fine, but paid themes are coded better, have much more options and the best part - offer free support. If you’re curious, I'm using GeneratePress theme.
Once you have decided on a theme, this is how you can install it:
Log into your WordPress admin page. You can get to it by typing in the address bar - yourdomain.com/wp-admin. If you forget your password, you can reset it here as well.
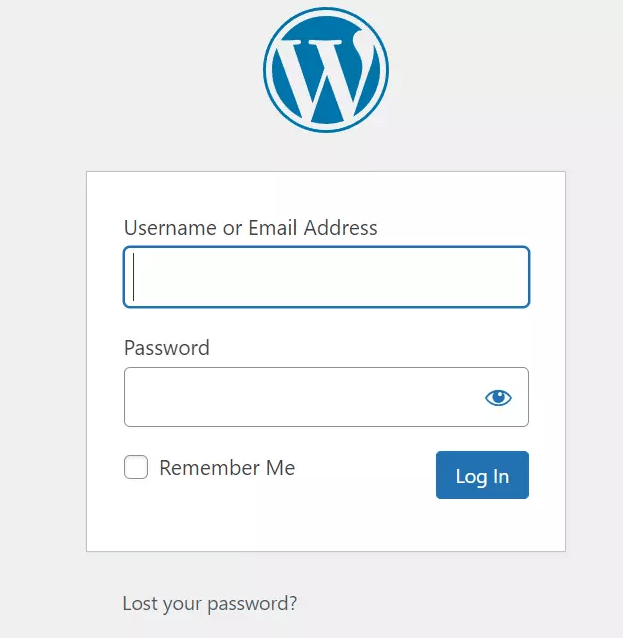
When you login, you'll see all the different items in your WordPress dashboard on the left-hand side.
Look for "Appearance". Below that, you'll see "Themes". Click on Themes.
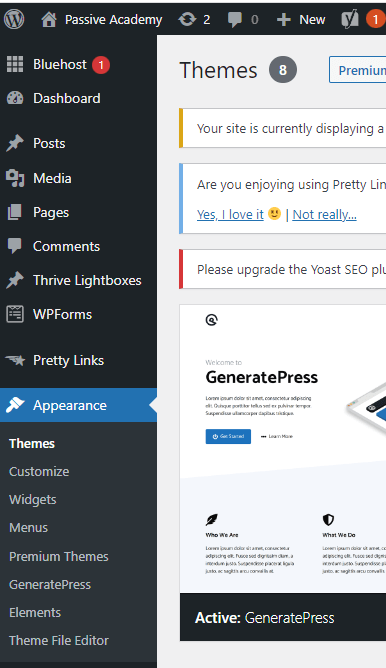
Next, click on the button "Add New". This will allow you to see different themes that WordPress offers.
Here you’ll find a ton of free WordPress Themes to choose from. You can even search for a particular theme and use the filter options to find something specific.
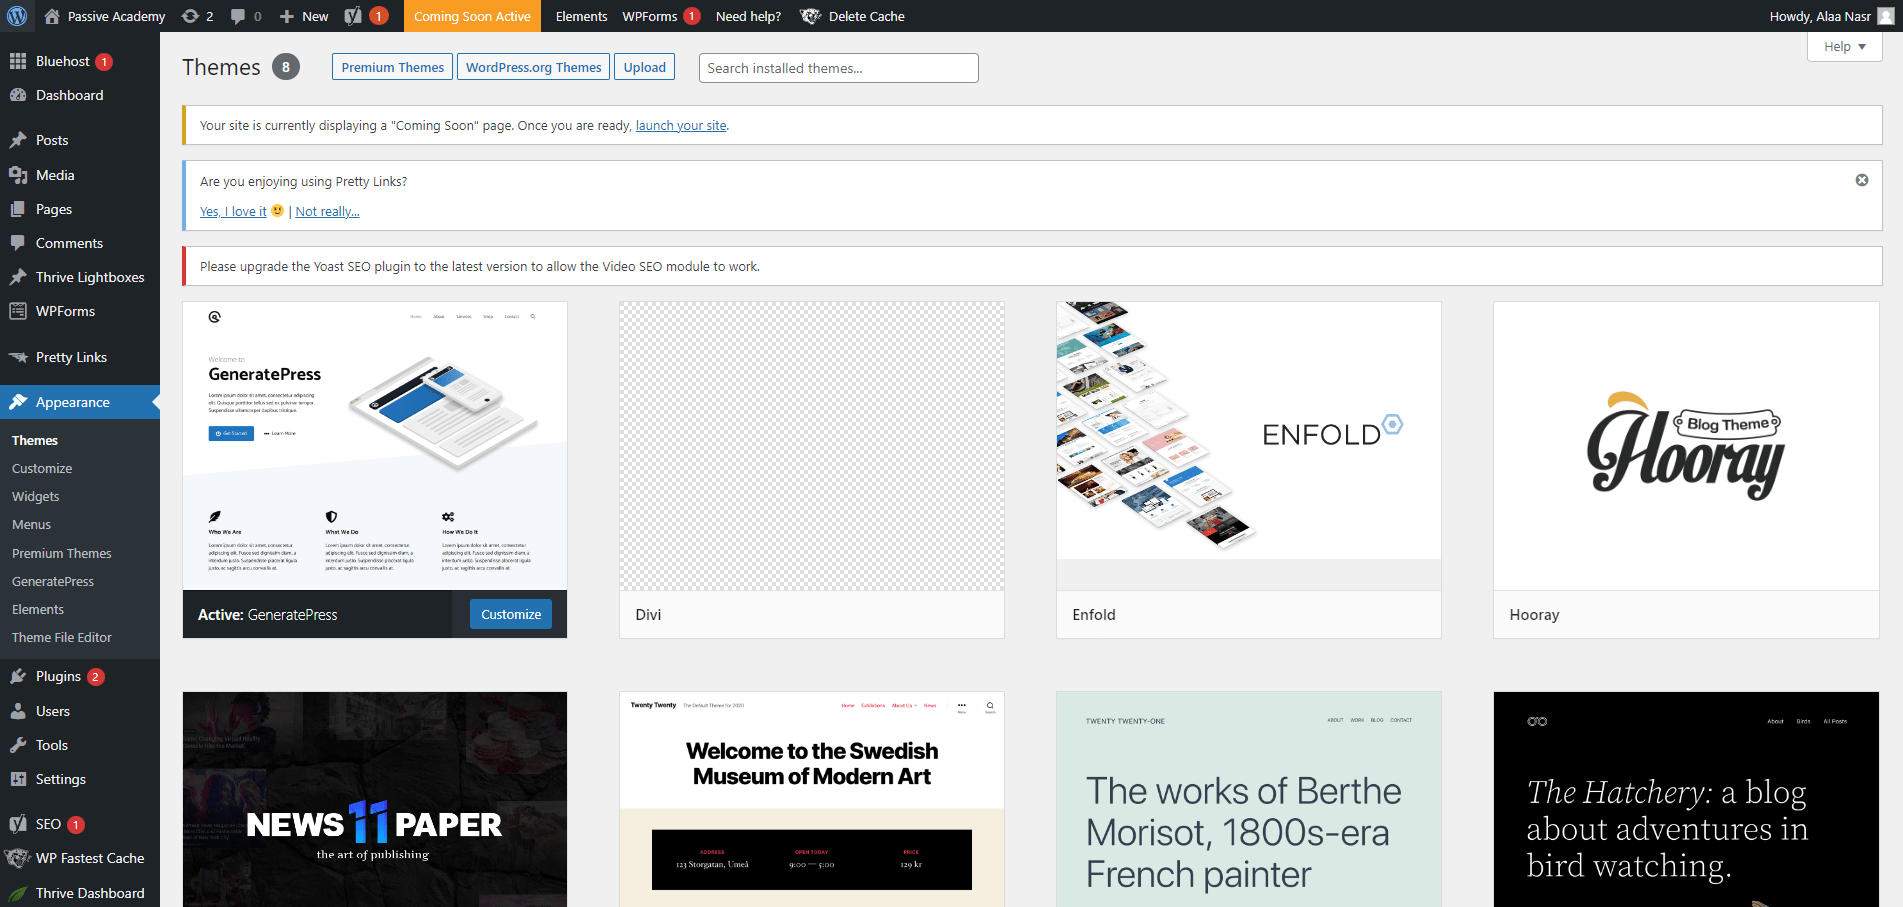
If you bought a theme or downloaded one already, you can install it by going to the same spot - "Appearance" / "Themes" / "Add New". You'd then upload the zip file and click install.
That's it! Your theme is now installed.
Ready to get your blog started with Bluehost and take advantage of my discount?
Step 5: Install Essential WordPress Plugins
Plugins are tools that integrate with your website to add features and customizations.
To upload a plugin, go to your WordPress dashboard, click on plugins, then click "upload plugin" and activate. Done.
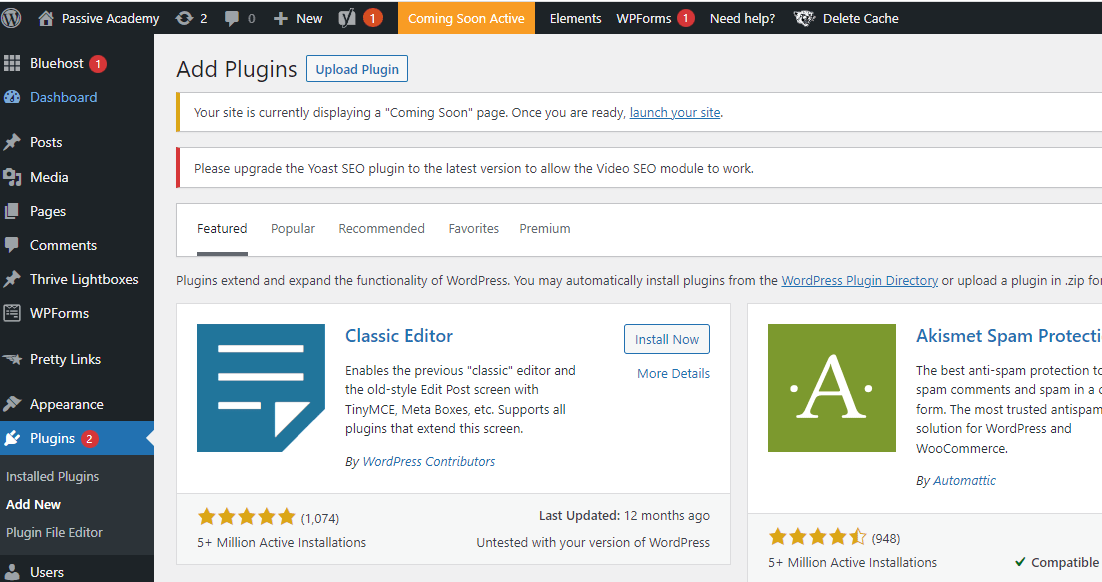
Here are some of the plugins you should be using:
1) Thrive Architect
Thrive Architect in my opinion is the best page builder. It's the one I use on my site and is the one that built this page as well.
You can use the free "Gutenberg" editor that comes with every WordPress theme, but Thrive Architect is just so much easier, especially for newbies.
Thrive Architect is a drag-and-drop page builder that makes it easy to design any page and it also comes with pre-built pages -templates- for almost any design you can think of!
2. Pretty links
A must have plugin. It cloaks any link -like those ugly and long affiliate links- making them look like a part of your domain. So, you can create easy to remember links using your domain, for ANY link on the internet.
3. ShortPixel
ShortPixel is a plugin that makes all your heavy images lighter by compressing them. This is going to make your pages load faster, giving your viewers a better experience.
4. WP Rocket
WP Rocket is a plugin that speeds up your website. It minifies HTML, CSS and JavaScript and more.
5. Yoast SEO
Yoast SEO is the only plugin I use to manage my sitemaps, page and post titles, meta descriptions and more. Simply, that makes Google discovers you blog much easier.
Step 6: How to Start a Blog The Right Way
Before you start writing blog posts, you first need to setup your "Home Page", "About Us", "Privacy Policy", "Contact Us".
Ok, you may be overwhelmed by now! Let me explain.
1) Home Page
Your homepage needs to be concise and to the point so that visitors know what your site is all about in just a few seconds. You don't want to overload them with too much information either, or they might not return.
To edit your home page, you can use a tool like Thrive Architect. You don't need to be a web designer. You can get inspiration from other sites and just drag and drop your content blocks onto the page. This includes text, videos, colored blocks, images, and more. My home page -and even this post- is designed using Thrive Architect drag-and-drop page builder!
2) Contact Page
Your contact page can either have a contact form or include your email address or Facebook page.
Your contact page is important because people will contact you for a variety of reasons. Don't ignore this step and make sure it's visible in your menu bar.
3) About Page
Your about page should be a brief introduction to who you are and what your blog is all about. It should be informal, down to earth, and designed to show your readers how well you understand them.
You can write about:
- Who you are
- Why you started your blog
- What experience in your niche, why would your audience trust you?
- Talk about the "pain point" that you are solving with your blog and your audience have. Make sure to include how you had your own struggles and were able to overcome them -Your success story-
- You can include a call to action on a free guide or eBook to capture their email
4) Privacy Policy Page
A privacy policy is essential for any blog to ensure that readers know what information the blog collects about them and how it will be used.
A well-written privacy policy will build trust with your readers and help you to avoid legal problems down the road.
You don't have to write it yourself, just Google "Privacy Policy Generator" and you can the content for free to use on your site. Just make a few tweaks and you're done.
Ok, it's time to write your blog post! 🙂
Step 7: Planning Your Content - Start Blogging
Now, celebrate for a while that you've done all the techy stuff. Let's write your first blog!
Look, You need to write content that people are "actually" looking for. You may be asking "How to know what people are looking for?". The answer is: Keywords.
You can use any keyword search tool out there to find out what people type in search engines -specially Google- and how many searches are done for each keyword! For example, there is a chrome extension called "Keywords everywhere", also "Ubersuggest" is another good tool. Just do a quick search on Google and you'll find a ton of these tools, ok!
In order to write a blog, each new blog post you write should be structured this way:
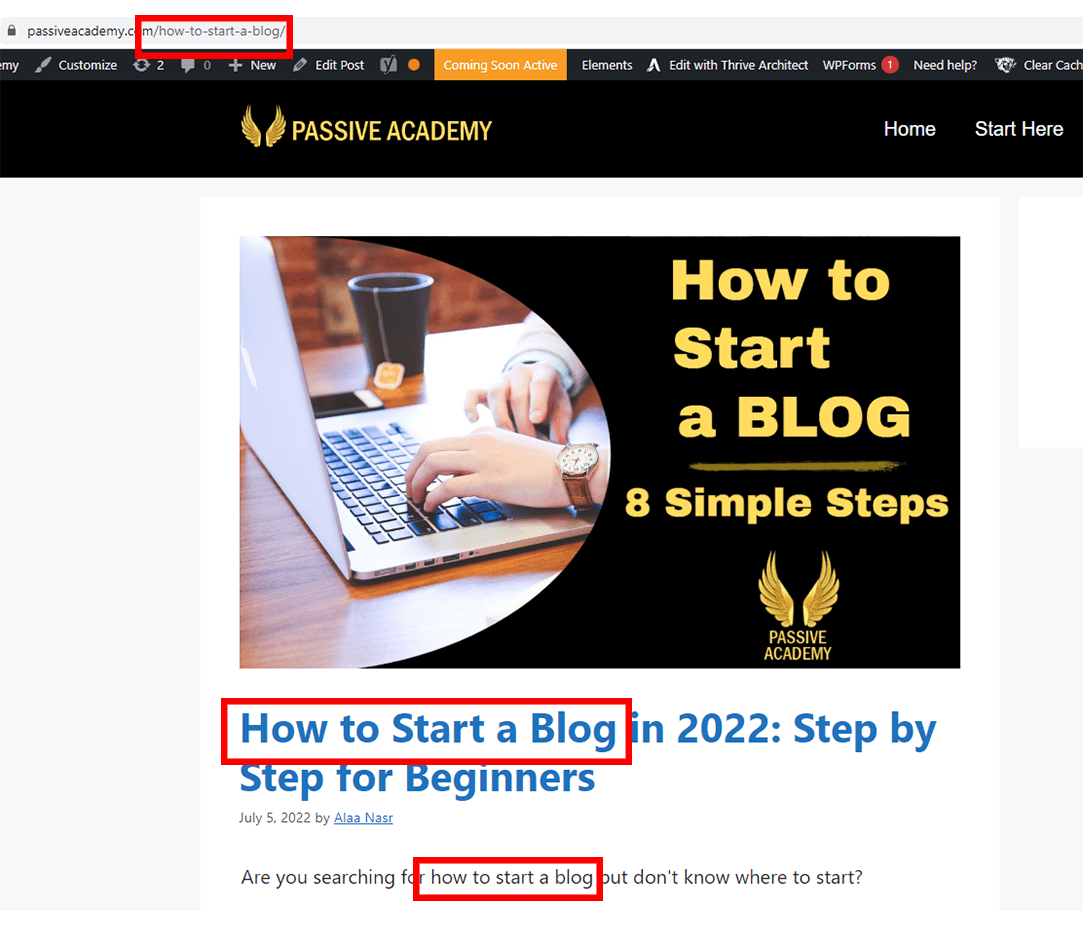
- Your keyword needs to be in the URL
- The keyword should also be in your blog post's title
- Your keyword should be somewhere in the first 3 paragraphs
- Include your keyword in H2 headings (not all, mix it up)
- Include keyword throughout your post (but don't overdo it)
Just like my blog post in this picture!
You know what will help you with that?! Yoast SEO plugin. It will tell you everything you need to change in your blog post to make it more SEO friendly.
How to Write Blog Posts that Match Google Search Intent
You need to know that Google LOVES certain types of content. Let me introduce you to the main 4 types of blog content that you may create!
1) Informational Intent
This means that someone is looking for general information about a topic. For example, they might enter a query like "what is Alzheimer's disease?" into Google. To write a blog post that matches this type of intent, you need to provide accurate and up-to-date information on the topic.
2) Navigational Intent
When someone is looking for a website or page related to Facebook login, they should enter "Facebook login" into Google. To write a blog post that matches this type of intent, you need to include links to the relevant website or page.
3) Commercial Intent
When someone is looking to buy something. For example, they might enter a query like "buy iPhone" into Google. To write a blog post that matches this type of intent, you need to include links to products or services that are for sale. That's a great way to earn affiliate commissions.
3) Transactional Intent
When someone is looking to buy something. They may be comparison shopping or looking for the best deal on a specific product. Whatever the case, their goal is to complete a purchase. That's also a great way to earn affiliate commissions through comparing and reviewing products in your niche.
Remember, you need to provide as much value as you can, in order for Google to push your article to your target audience.
Tips For Writing Blog Posts
First, I want you to know that to make money blogging you don't need to write like a pro. You don't need to be a superstar! I will give you a list of thing you can do that will make your blog writing easier. Ready?
1) Use Grammarly
The free version is really good. It will catch a lot of mistakes.
2) Use short, concise sentences
This makes your content easier to read and more engaging. The best way to do this is to keep your paragraphs short- no more than three or four sentences. Also be sure to use plenty of white space. This will help to break up your text and make it more visually appealing.
3) Use Easy Words
Use simple words and phrases that your audience are familiar with. If you can keep your language simple, your readers will appreciate it and be more likely to come back for more.
4) Use H2 and H3 Tags properly
Headings are not only important for helping your readers navigate your article, but they also helps search engines index your content properly.
For maximum SEO benefits, you should use H2 tags for your main headings and H3 tags for any subordinate headings. Keep in mind that all headings should be formatted using proper tag hierarchy; in other words, don't skip from H2 to H4 without first using an H3 tag.
By taking the time to format your headings correctly, you can be sure that your blog posts are both easy to read and easy to find by search engines!
5) Use readable fonts
This means choosing a font that is simple and clean. Second, you'll want to choose a font that is size appropriate, not too small and not too large.
6) Use bullet points
By breaking down your information into smaller, bite-sized pieces, you can help your readers to digest the material easier which of course makes your blog more engaging.
7) Provide Value
Your blog posts should be written in an interesting, engaging way so they provide value to your readers. This entails beginning with an expectations paragraph, following it up with content relevant to that expectation, and ending on a nice note that leaves readers wanting more.
Ready to start your blog? I highly recommend Bluehost.
Step 8: Promote Your Blog
The best way to promote your blog is with links.
But how do you do this? Here are some strategies you can use:
1) Social Media
To get started with social media, all reputable sites will have a Facebook, Twitter, Instagram or even YouTube channel. These pages are easy to create and allow you to link directly to your blog from them.
2) Answer Questions!
Get involved in Reddit, Quora, and Facebook groups. Search for people asking questions related to your blog posts and answer them and provide your link. But keep in mind, don't spam, otherwise you'll be kicked out and banned!
3) Guest Blogging
Guest blogging is where you reach out to other bloggers or websites and ask if you can write an article to be posted on their site. In your article, you will include a link back to your blog.
Of course, this strategy involves cold emailing and relationship building.
If you want to stand out from your competition, consider writing about topics that they don't write about. Then, recommend some topics to write guest blog posts about to help increase your visibility and reach.
How to Start a Blog Summary
Starting a blog is easy. You just need to create good content and promote it through links. If you do this properly, your blog will eventually gain authority and be rank in the search engines.
Let's do a recap of the steps involved in how to start a blog:
- Choose Your Blog Niche
- Set Up Your Blog
- Install WordPress
- Choose a Theme for Your Blog
- Install Essential WordPress Plugins
- Create The Essential Pages
- Create Engaging Content
- Promote Your Blog
And that's it! 🙂


